There are many common scripts that people install on their websites, and WordPress might just be the most common. Many programs have been made to help users quickly install these scripts, and Softaculous is becoming a popular choice. Premium hosts like HostPapa are offering Softaculous because it has many unique scripts and features. If you are having a hard time installing WordPress with cPanel and Softaculous, then read this step-by-step guide so that you can start working on your blog.
1. Enter cPanel and Softaculous

The first thing you need to do is sign into cPanel. Most hosts have a sign in link that will bring you directly to the cPanel interface. If you’re hosting with HostPapa for example, you can simply go to “yoursite.com/cpanel” where “yoursite.com” must be changed for your domain name. Enter the username and password that you created when you purchased the hosting plan. This will give you access to the cPanel tools.
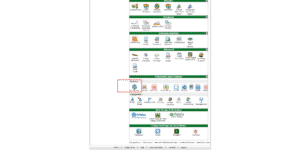
Scroll down until you see a heading titled, “Software.” You will find Softaculous under this heading. Click it to start the Softaculous program.
2. Preparing the WordPress Installation

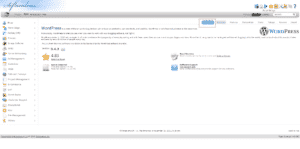
Softaculous has many different scripts that you can instantly install, but you need to tell it what script you want to use. Scroll down the left sidebar until you find WordPress. It will be under the heading labeled, “Blogs.” You can select WordPress by clicking it.
This will bring up a new window with information about WordPress. At the top of the new window you should a horizontal list of links and options. Click the link that is labeled, “Install.”
3. Customize the Installation

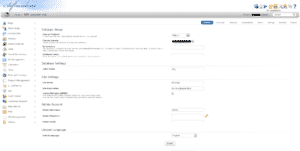
Softaculous has default settings that are perfect for a basic installation, but it’s always a good idea to go through the settings to ensure that the installation is right for your needs. The first window you will see allows you to customize the domain and the directory.
If you only have one domain, then there is no need to change the domain form. If you have more than one, then click the drop-down menu and choose the domain that you want to install WordPress on.
Under that form you will find an area where you can customize the directory. The directory refers to where WordPress will be installed. For example, if you want WordPress installed on the main page, then leave this area blank. If you want the blog installed on a directory like domain.com/blog, then type in the name of the directory.
The next section you should pay attention to is the site settings. You can enter the site’s name and description, or you can leave these blank for now. Entering information will make it easier for people to find your blog, but it isn’t essential.
The last thing you need to pay attention to is the admin section. You need to enter a custom username, password and email address. The username and password are used to enter the WordPress admin section after the blog is installed.
The last thing you need to do is click the install button at the bottom. Softaculous will automatically install all of the essential WordPress files.
Conclusion
Installing WordPress with Softaculous is very easy, and it should only take a few seconds to do on HostPapa.com. If you want to install any other scripts, then you just have to follow the same general instructions. You can now sign into WordPress and customize your themes, plugins and layout to make the perfect blog.
Leave a Reply